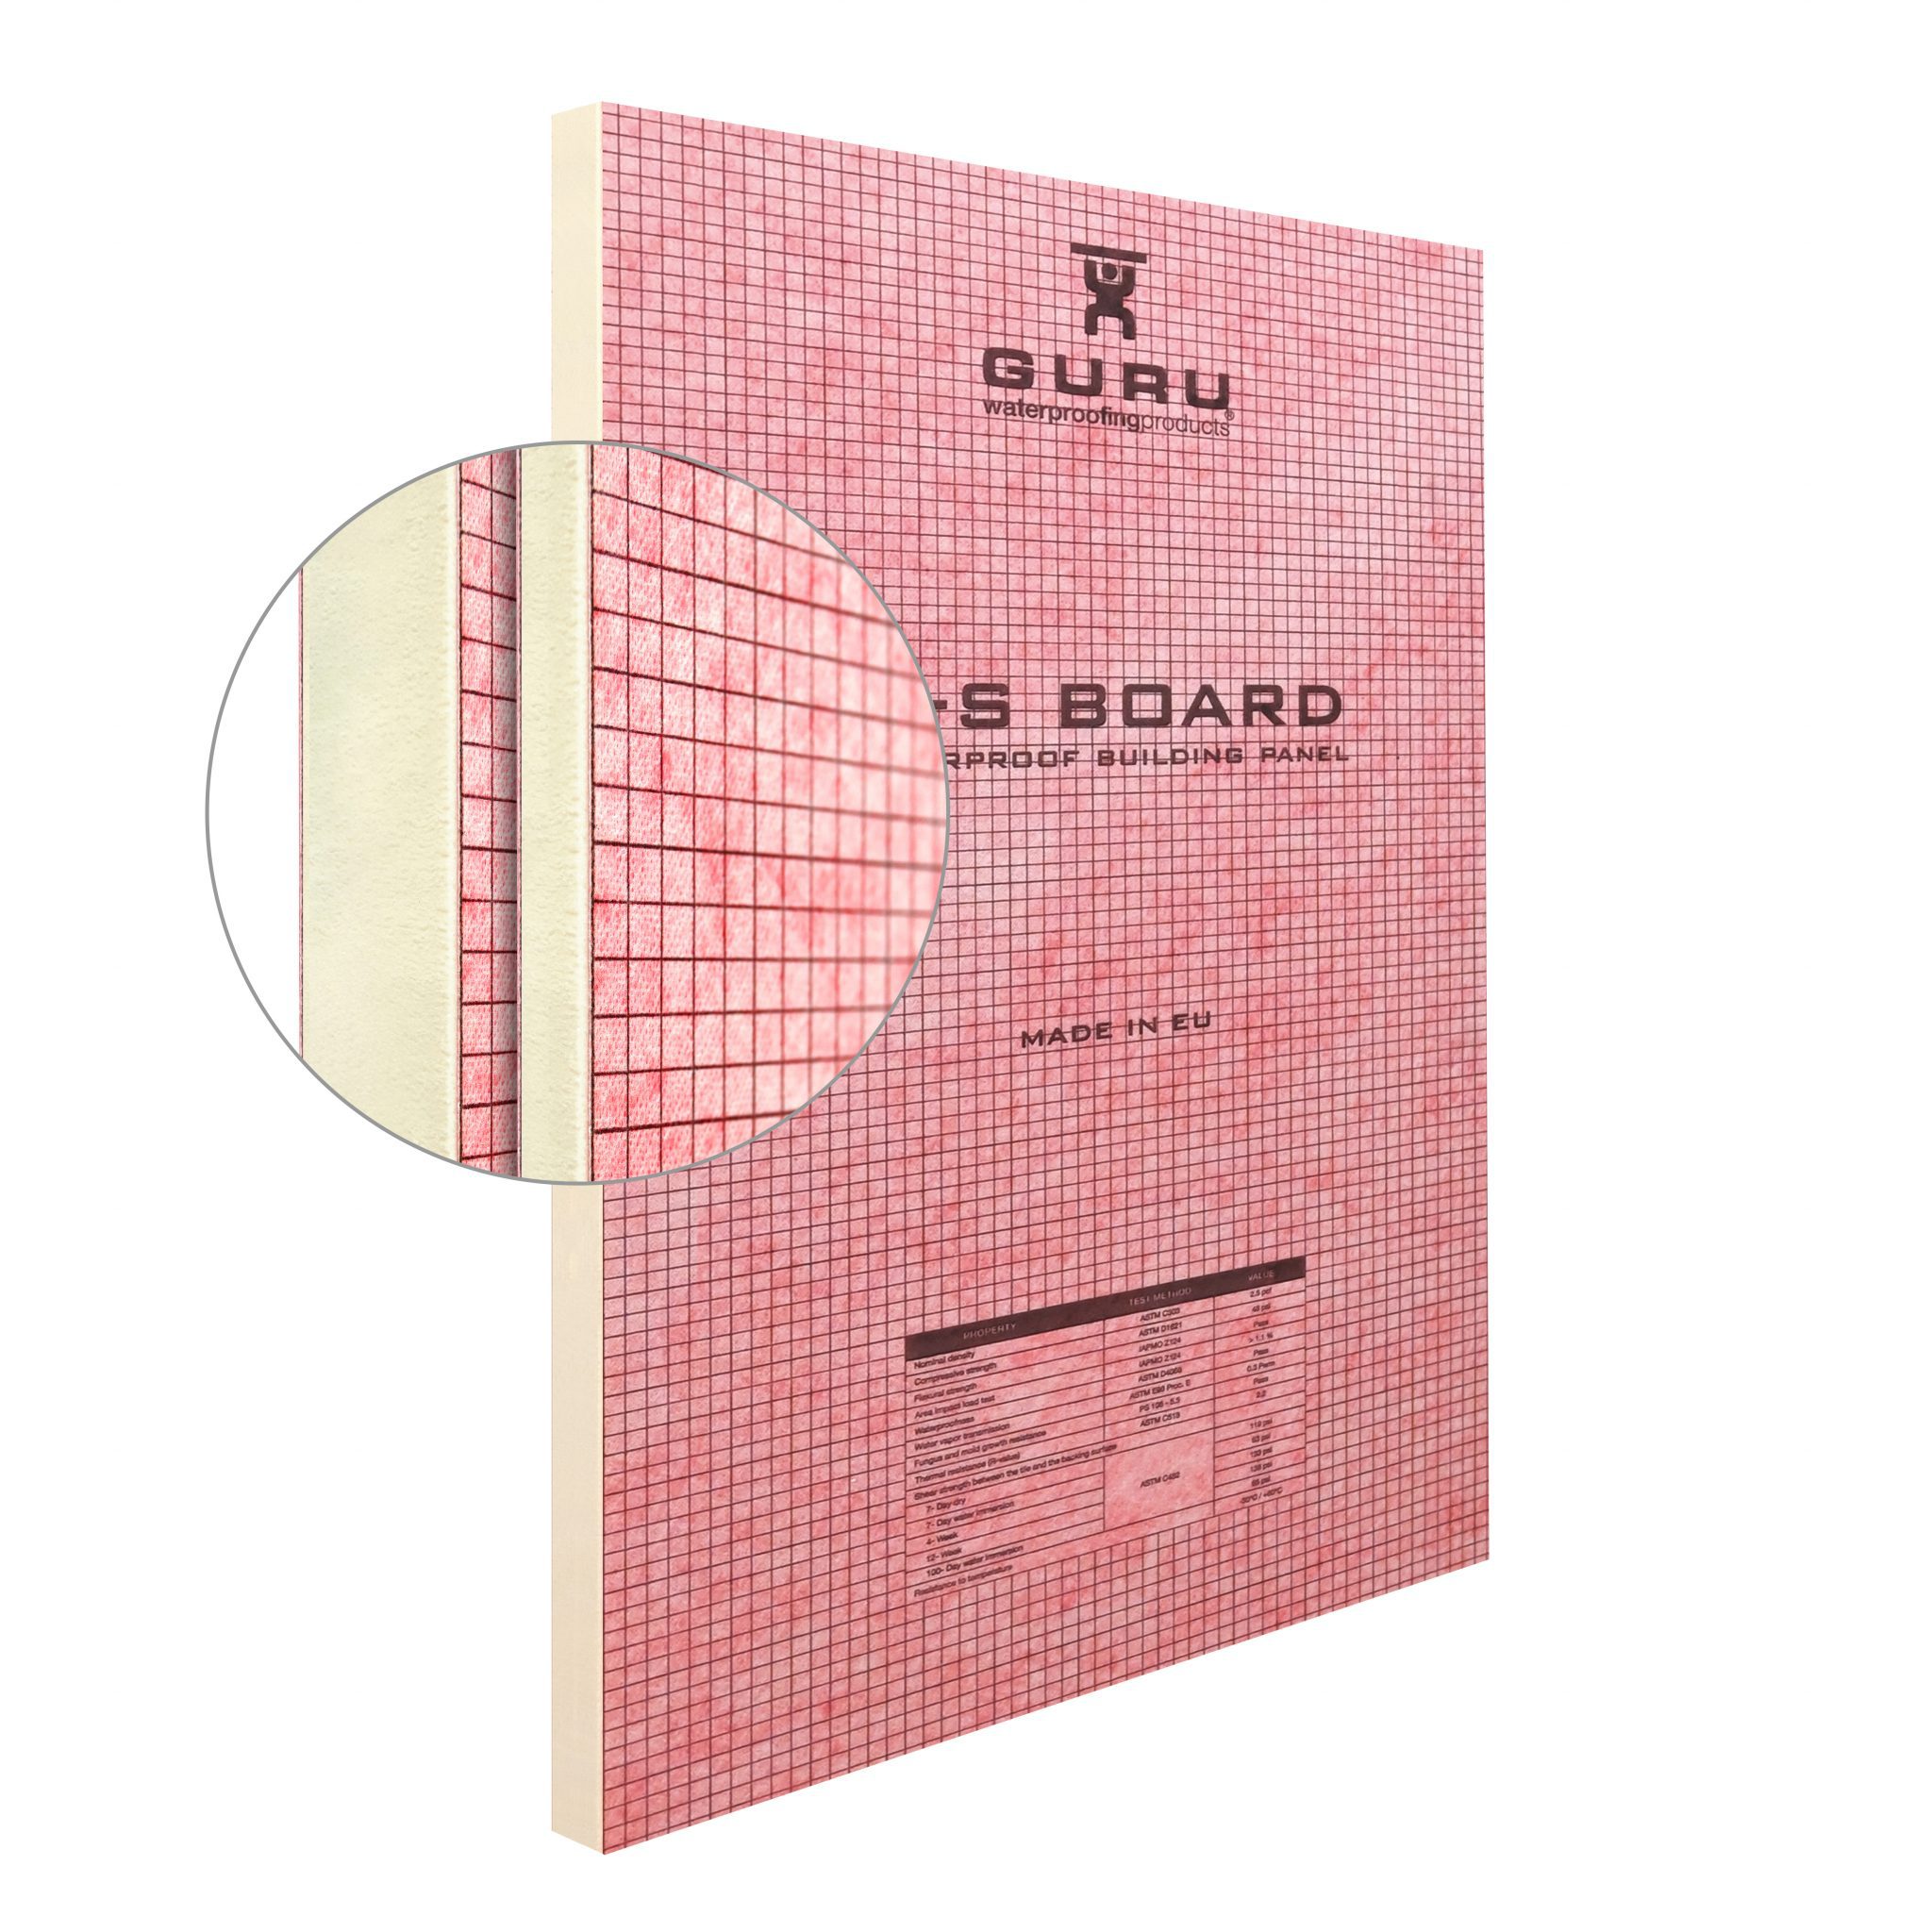
Our W-S BOARD is a wall board shower construction panel with waterproofing included for tile coverings, perfect for waterproofing or building new showers spaces. It can be installed on wooden structures or metal profiles for drywall partitions (plasterboard type) to create a new partition or on the existing partitions themselves to level the irregularities of the walls for the subsequent installation of ceramic tiles and also to waterproof. Another of its most common uses could be for renovations or reforms, installing the panel directly on the old ceramic to later install the new coating on a completely smooth, plumb and uniform surface.
The uses of building panels with waterproofing included are varied, providing a large number of advantages:
BOARDS ON SHOWERS
Drywall is perfect for creating new areas or renovating old areas, thus avoiding the problems of traditional construction.
WATERPROOFING
The W-S BOARD is completely waterproof thanks to the included WATER-STOP film. This feature is ideal for installation in bathrooms, showers and wet areas.
RENOVATIONS
Perfect for renovating old walls. We glue the panel on the old support and then install the new covering on the W-S BOARD itself.
ADAPTATION
The W-S BOARD construction panel can be installed on wood, metal or masonry walls thanks to the tongue and groove system included. They can be installed both vertically and horizontally.
Drywalls for showers: Installation modes
As mentioned above, the W-S BOARD drywalls building panels can be installed both on wooden structures and on the walls themselves, the installation of both being different:
Installation on wooden structure or panels
In this type of installation we will fasten the panels to the structure with screws and washers that you will find in our Fastener Kit. This kit has an anticorrosive protection in all its parts. For the installation to be completely waterproof, the screws should be coated with some type of sealing putty such as W-S MASTIC. In wall installations the screws are placed every 11-12″ vertically and every 5-6″ horizontally. On the other hand, in ceilings they should be installed every 2-3″ vertically and horizontally.
Installation on building walls
When it is going to be installed on building walls or on an old installation, a glue cement base type C2 or monocomponent, such as our Easeal, should be used to fix the panels and to standardize the possible unevenness or flaws that may exist.
Do you need more information about the W-S BOARDS?
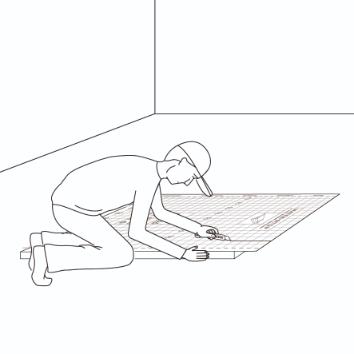
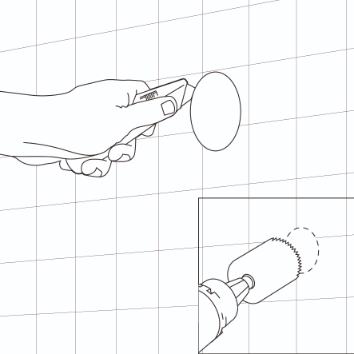
Use a utility knife to cutto size the board and to create the cutouts for pipes and fixtures.
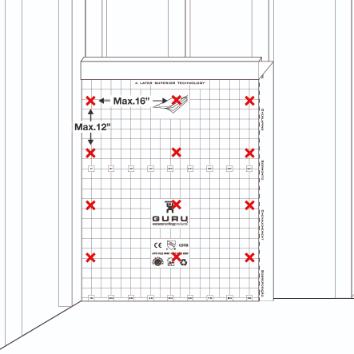
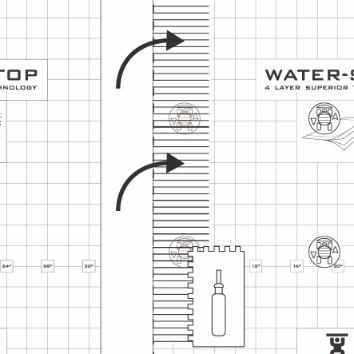
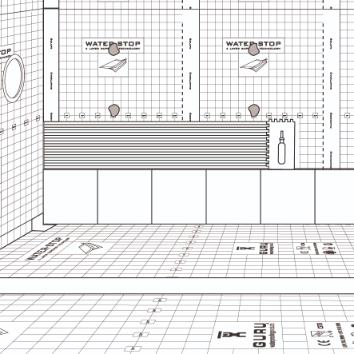
Screws should be maximum spaced 12” o.c. (30 cm) vertically and 16” o.c. (41 cm) horizontally. Ceilings: Screws should be maximum spaced 6” o.c. (15 cm).
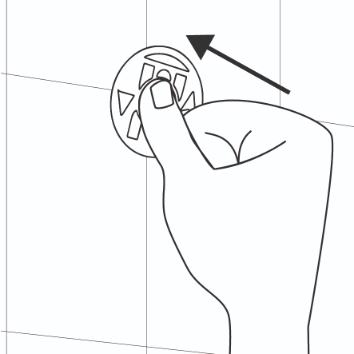
Install from the bottom of the wall, fixing the W-S Board to the wall studs. Note: For tub walls first apply a bead of W-S Sealant adhesive along the top edge of the tub, not lower than 4” above the floor, and immediately install the W-S Board.
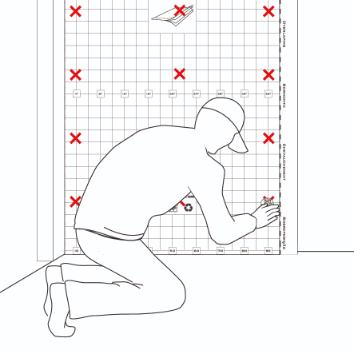
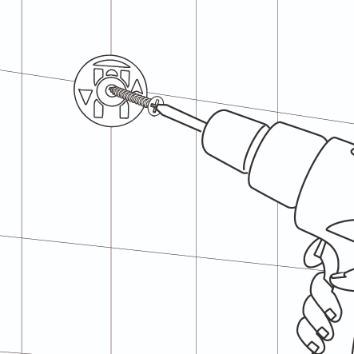
When installing in wood substrate fasten the board directly to studs using W-S Board Screw and W-S Board washers puncturing the board. When installing in metal studs use self-tapping screws.
The selected screws must have enough length to reach adepth of at least 3/4” (19 mm) in wood studs and at least 3/8” (10 mm) in metal studs.
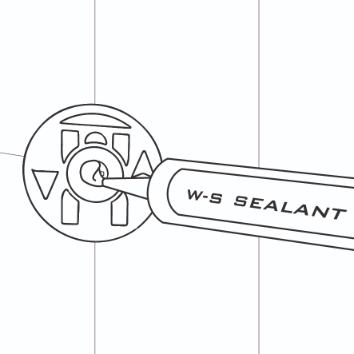
. W-S Board is waterproof, but for a waterproof installation all joints, corners, pipe penetrations and fasteners must be sealed.
Use W-S Sealant to totally cover the puncturation points. Make sure to totally cover any punturation point with W-S Sealant.
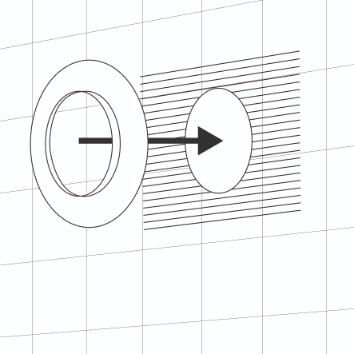
. Set all the panels surrounding the area. Note the board has a flange to faster seal the board one to the other. Display them to do so.
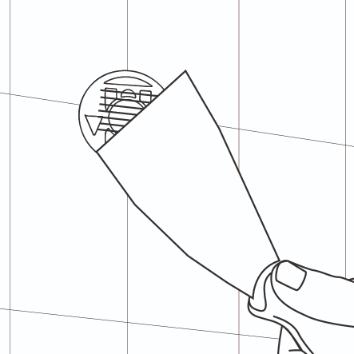
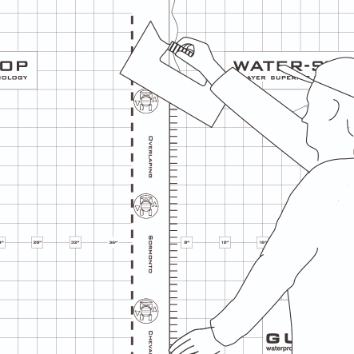
To waterproof the joints beyond W-S Board apply modified thin-set mortar with a 1/4” notched trowel (G-Trowel). Use polymer modified thin-set meeting without additives ANSI A118.4, A118.11, or A118.15.
Lay the WATER-STOP flange and press firmly. Remove any trapped air to guarantee full adhesion by spreading the adhesive from the inside out using a margin trowel or similar. All excess adhesive should be spread thin ensuring a continuous seal.
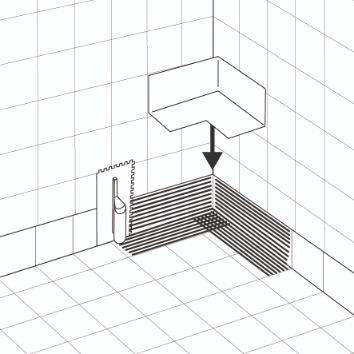
Use the preformed W-S Corners to seal the installation by following the same procedure as the flanges.
Open the pipe conection area use a utility knive or a drilling crown.
Follow the same procedure as before with the flanges and corners to seal the area using the W-S Mixing Valve or W-S pipe conection products.
The Tiles can be installed immediately after, using polymer modified thin-set without additives ANSI A118.4, A118.11, or A118.15. Choose a notched trowel to match the tile format.